We are approaching “D-Day” regarding having GA4 set up and installed on your website. With that in mind, this article will discuss all the steps you need to follow to get GA4 set up for your business and installed on your website.
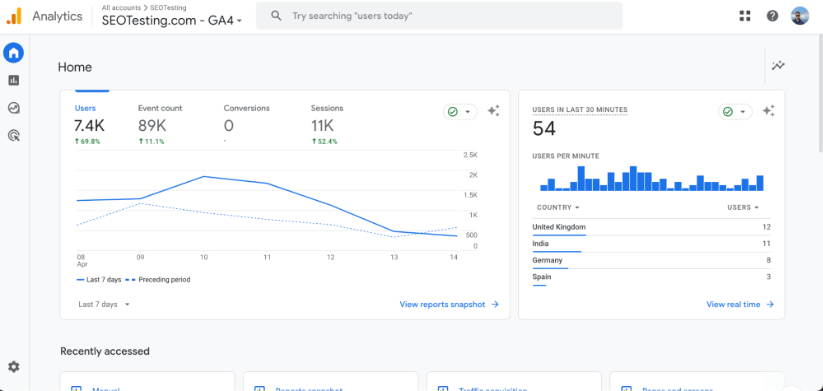
By the end of this article, you will have a fully functional GA4 dashboard for your business, collecting data and looking something like this:
Are you ready to set up your GA4 business account? Let’s get started immediately!
How to Set Up GA4 for Your Business
Before installing GA4 on your business’ website, you must create a GA4 account and a business data stream for your company. This section will walk you through the steps to do just that.
Step 1: Create Your GA4 Account
Before anything else, you need to create your GA4 account. To start, head to https://analytics.google.com/ and sign in with your Google account. If you do not have a Google account, you can create one for free.
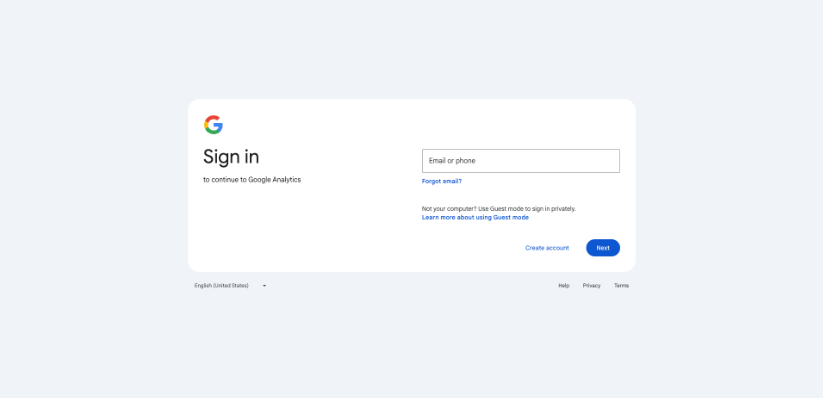
Once you have signed in, you will be greeted with the setup screen:

Click “Start measuring,” and you will be taken to the GA4 setup guide. From here, you need to create your GA4 account. All you need to do is fill in your account name and whether you want to allow data sharing with Google.
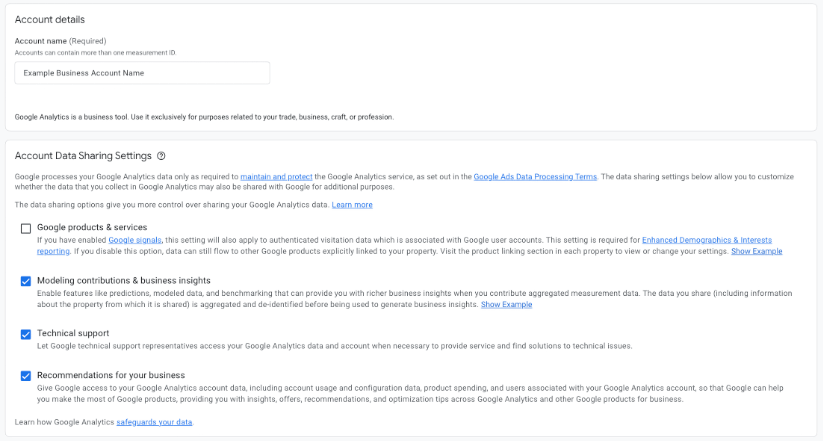
Once you’re done here, click “Next” at the bottom of the screen.
Step 2: Create a Property Within GA4
The next step is to create your GA4 property. Again, this is another easy step. Simply fill in your:
- Property Name
- Time Zone
- Currency
So if we were doing this for SEOTesting, for example, we’d enter SEOTesting as our property name, and our time zone would be GMT with a currency of the British Pound.
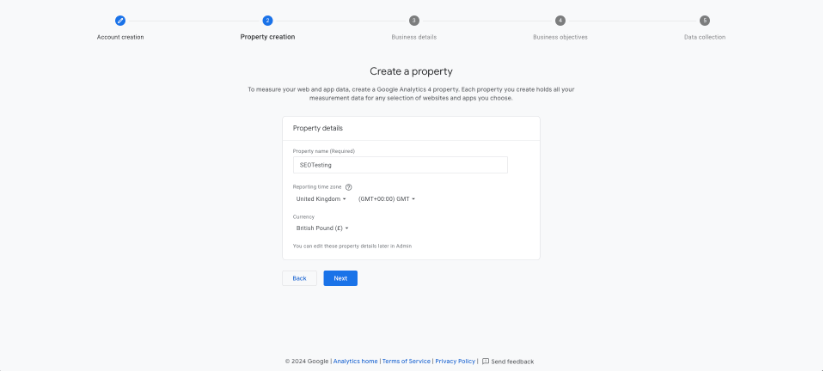
Click “Next” at the bottom of your screen once you are done here.
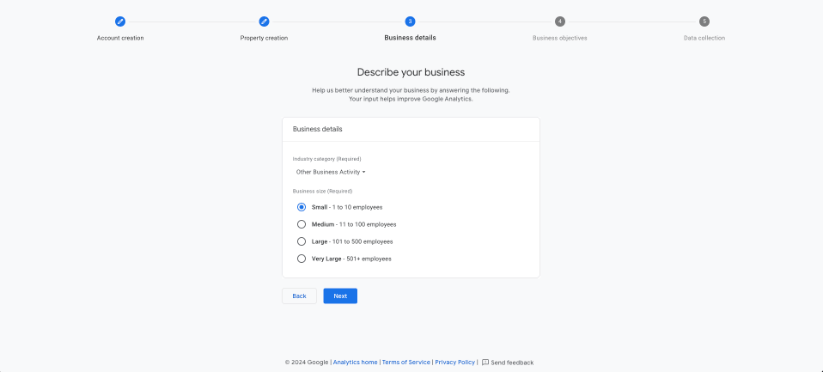
Step 3: Input Your Business Details
At this point, you will be prompted to enter your business details. Again, there is not much to do here but to answer the simple questions Google has laid out for you.
If we were using SEOTesting as an example, we’d just need to fill in our industry category; in this case, we’re going for “Other Business Activity” and the size of our business.
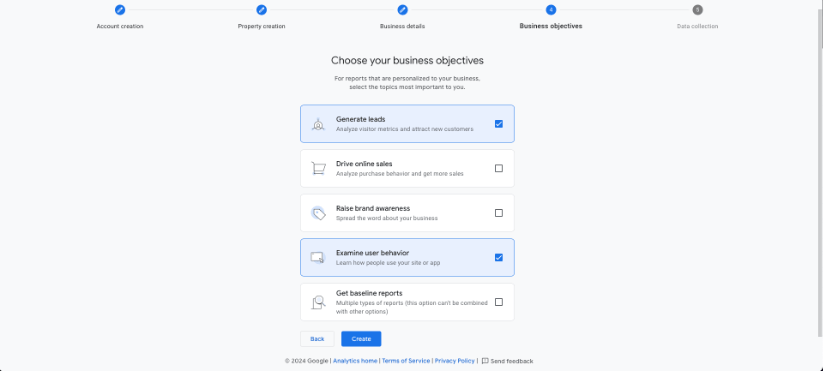
Step 4: Input Your Business Objectives
Before creating your data stream, Google will ask you about your objectives when using GA4 for your business. You have some options that are pre-determined by Google for you to select:
- Generate leads
- Drive online sales
- Raise brand awareness
- Examine user behavior
- Get baseline reports
You can click on as many of these as you want. Some businesses may wish to use it to generate leads and drive online sales, while others may want to raise brand awareness. Alternatively, you can click “Get baseline reports” to be given the “standard” range of GA4 reports when installed on your site.
Select the option/s that works best for your business. Don’t worry &mdash you can customize the reports later, and we will show you how to do this in other articles.
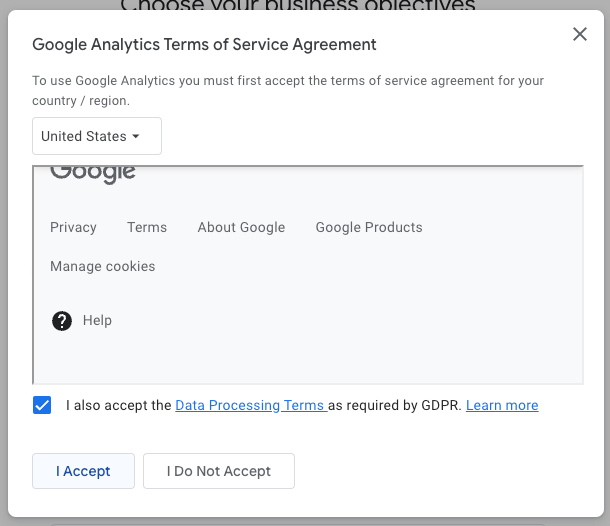
Once you click “Create” and ask Google to start setting up your GA4 dashboard, you need to read and accept the standard service agreement that comes up:
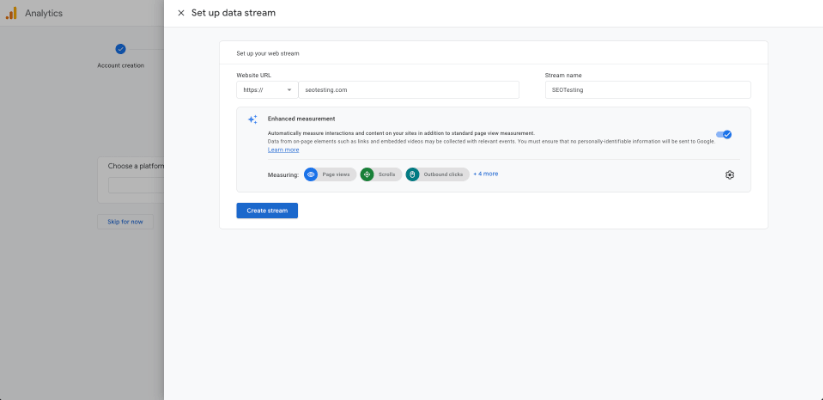
Step 5: Create a Data Stream
The final step in setting up your GA4 account and creating a data stream is creating the data stream. Again, Google simplifies this process for you!
Choose a platform from which you want to start collecting data. You’ll likely choose “Web,” but GA4 can collect data from Android or iOS apps. We won’t show you how to do that in this article; we’ll focus on the web.
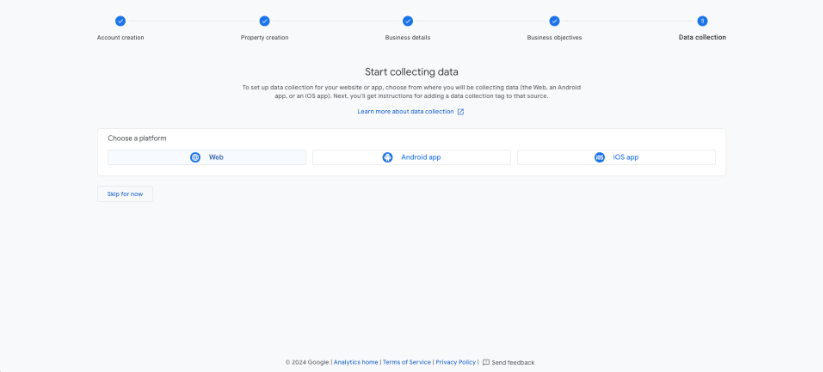
Click “Web,” and Google will show you a pop-out banner where you can input the final details. You simply need to type in your website URL, your stream name (so you can identify it later), and whether you want enhanced measurement selected.
Enhanced measurement refers to an automated tracking feature that enables data collection about specific user interactions on a site without needing additional set-up or custom code.
Click “Create stream,” and Google will create this for you, giving you another pop-out banner with the details of your data stream:

Take note of the Measurement ID that Google gives you. You will need this when installing GA4 on your website.
Speaking of installing GA4, let’s look at the steps to do that!
How to Install GA4 on Your Website
To round off this article, we will follow the steps to install GA4 on your website. You have three options here:
- Installing GA4 manually.
- Installing GA4 via Google Tag Manager.
- Installing GA4 via a website plugin.
We will give you the steps for each option!
Option 1: Install GA4 Manually
All websites have the option to install GA4 on their site manually. To do this, head back to the GA4 screen we had open earlier with the details of your GA4 data stream:
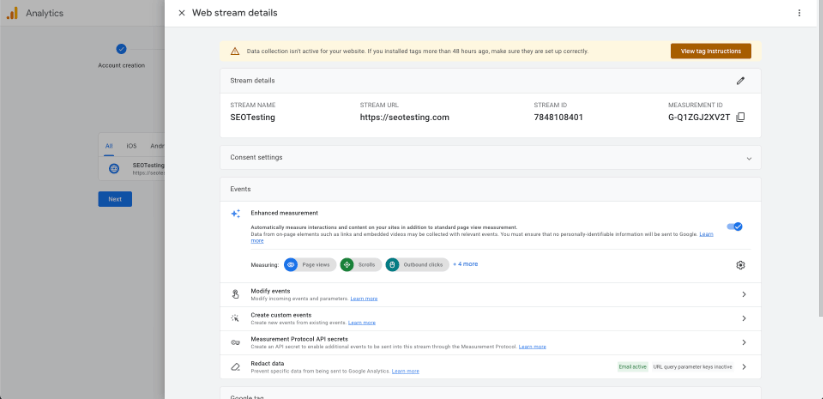
You will notice a message at the top of the screen saying that data collection isn’t active. This is, naturally, because we have yet to install it on our website.
Click on the “View tag instructions” button that is shown. You will be greeted with a pop-out banner from Google giving you different instructions. You have instructions for installing with a website builder or installing manually:
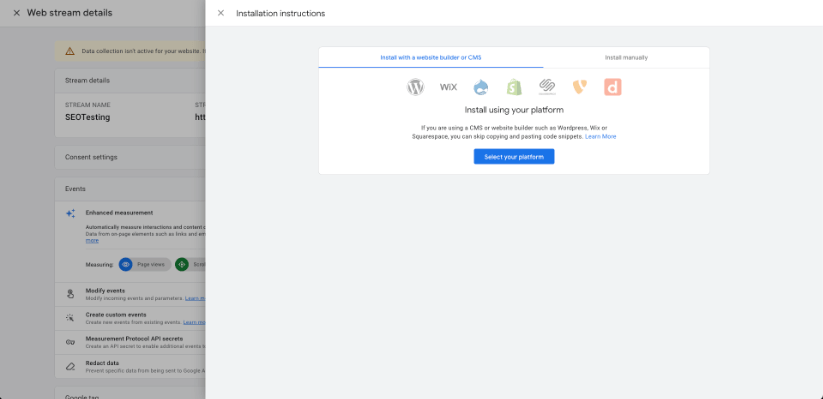
Head to the “Install manually” selection and click on it. This will give you the JavaScript tag that you need to add inside the <head> element of your website’s HTML file:
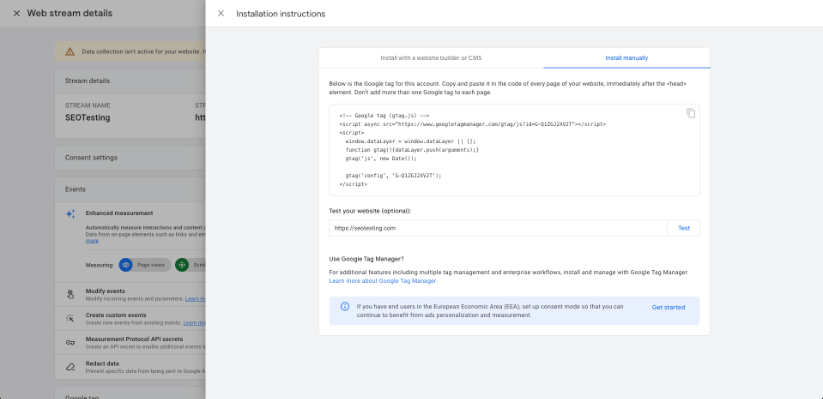
Copy this JavaScript snippet and paste it into your website’s HTML file. We’ve noted below where it should go:
<!DOCTYPE html>
<html>
<head>
(Paste your JavaScript snippet here)
<title>
This will allow GA4 to be installed and run every single time a page on your website is opened.
Option 2: Install GA4 via Google Tag Manager
Suppose you do not have the development capacity/resources to manually install GA4 on your website. Installing via Google Tag Manager (GTM) is an excellent option as it does not require much technical knowledge!
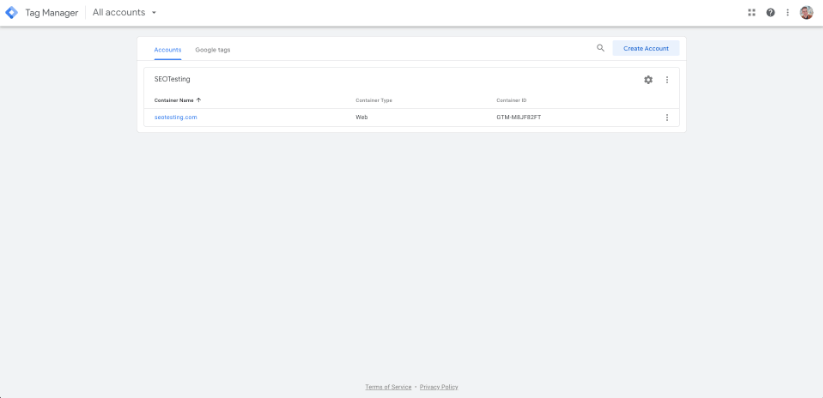
First, head to https://tagmanager.google.com/ and select the container in which you wish to install GA4:
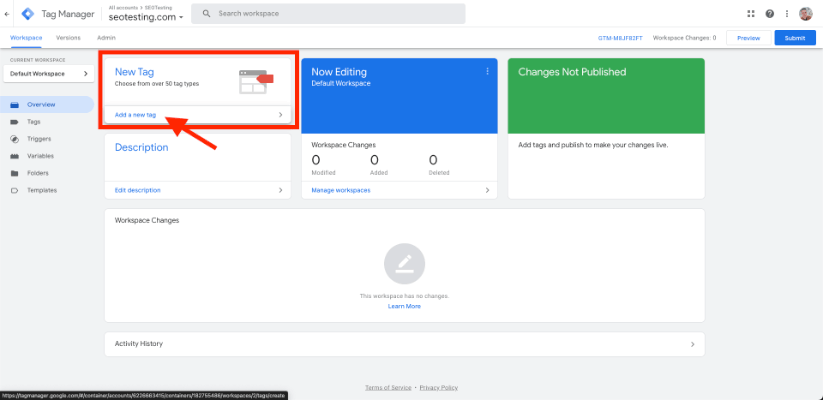
Once you have selected the container you’d like, you will be shown your GTM dashboard. Here, select “Add a new tag” in the top-left-hand corner of your screen:
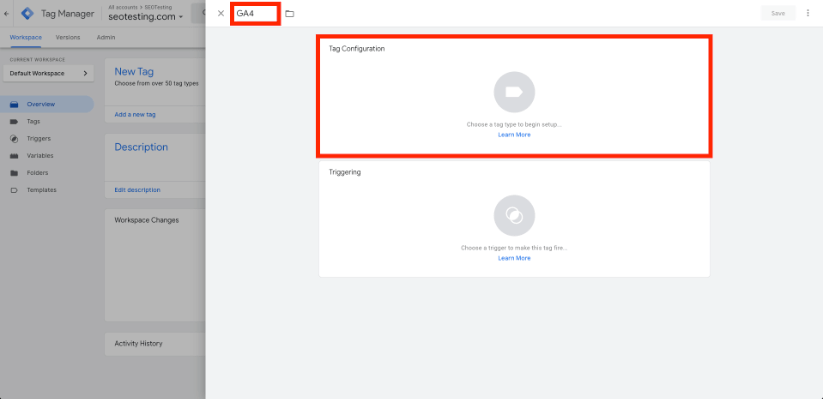
You’ll be greeted with a pop-out banner allowing you to choose the configuration for your new GTM tag. Select the “Tag Configuration” box. Don’t forget to name your tag, as well, so you can come back to this later if needed:
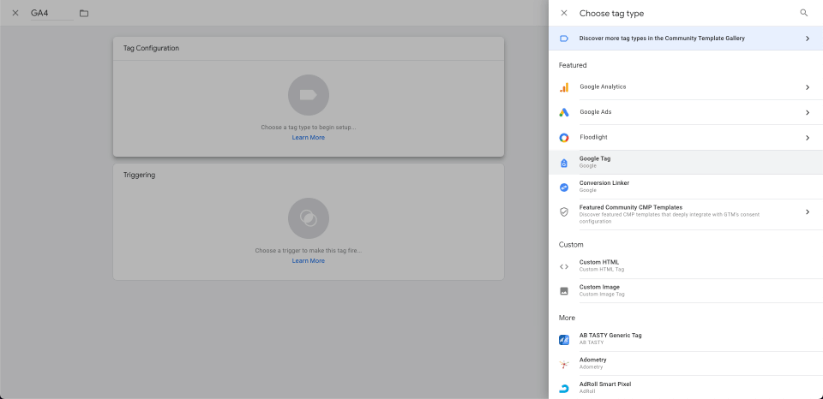
When you click “Tag Configuration” and the pop-out box from Google appears, choose “Google Tag” when prompted. You’ll see this on the right-hand side of your screen, about halfway down your page.
Once you have selected this option, a new box will appear where you are prompted to insert your “Tag ID.” This is where you need to paste the “Measurement ID” that you saved earlier when setting up your GA4 data stream.
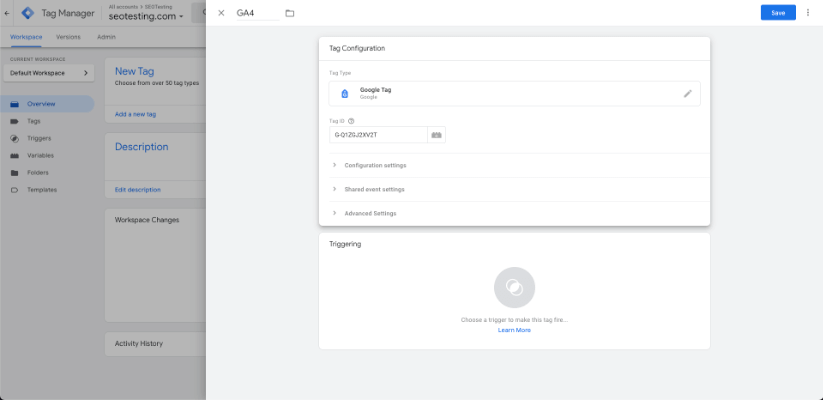
You can then set up your configuration, shared event, and advanced settings if necessary. But your tag will work fine if you leave these as they are.
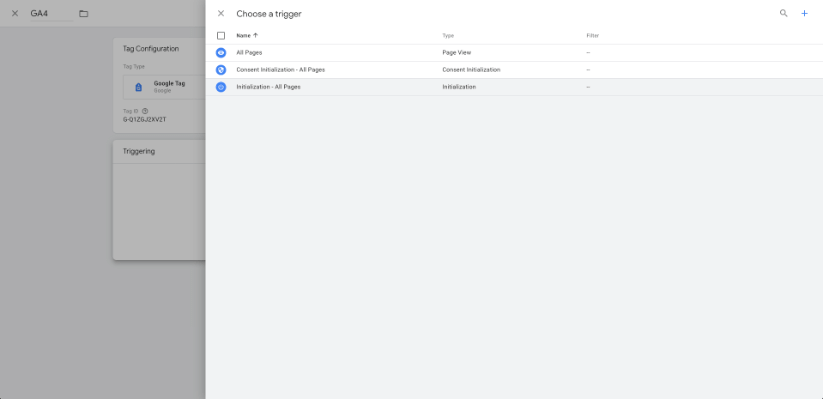
Once you have pasted your GA4 Measurement ID into the “Tag ID” box, click anywhere on the “Triggering” box to manage how this tag is triggered on your website.
This will give you three pre-determined options:
- All Pages
- Consent Initialization – All Pages
- Initialization – All Pages
Select the third option, Initialization – All Pages, as this will cause this tag to load before any other tags on your site.
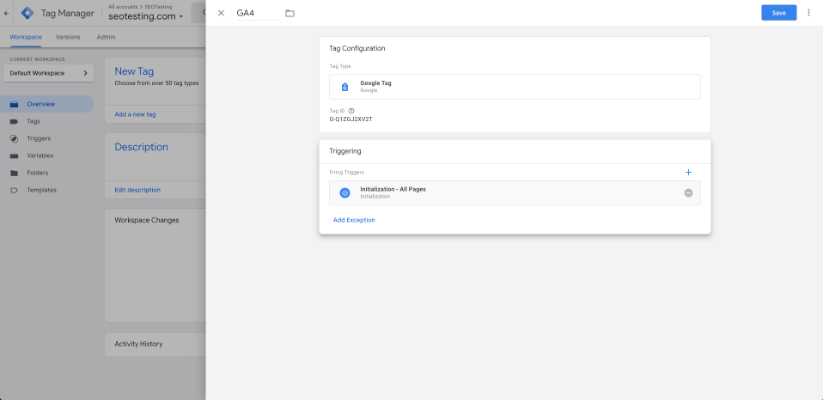
Finally, click “Save” at the top-right of your screen to save the tag configuration:
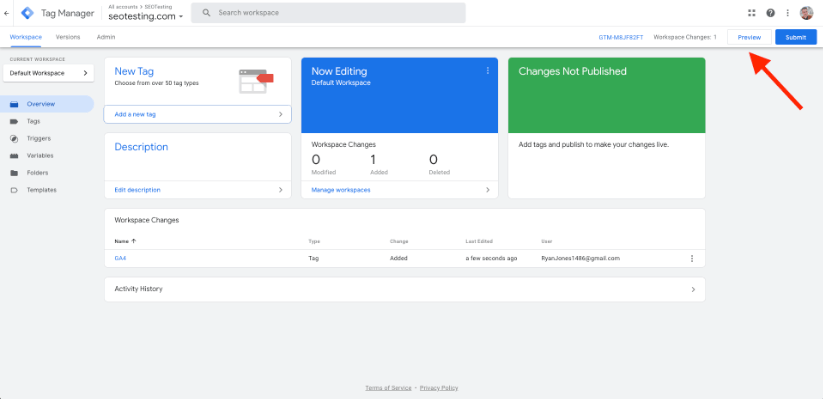
Before you publish these changes, you need to preview them in your GTM space to ensure they work correctly.
Click “Preview” at the top-right-hand side of your screen:
A new browser window will open. Enter your website’s URL and click “Connect,” which will allow GTM to run this new version of Google Tag Manager on your site and check that everything is working correctly.
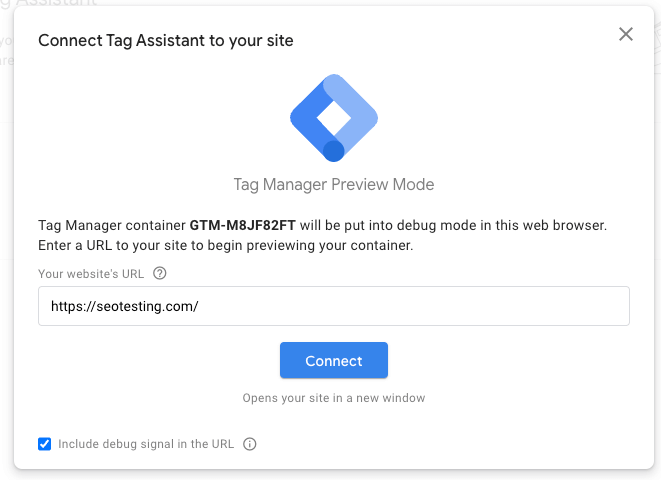
All being well, it will work perfectly, and you will see a success message:

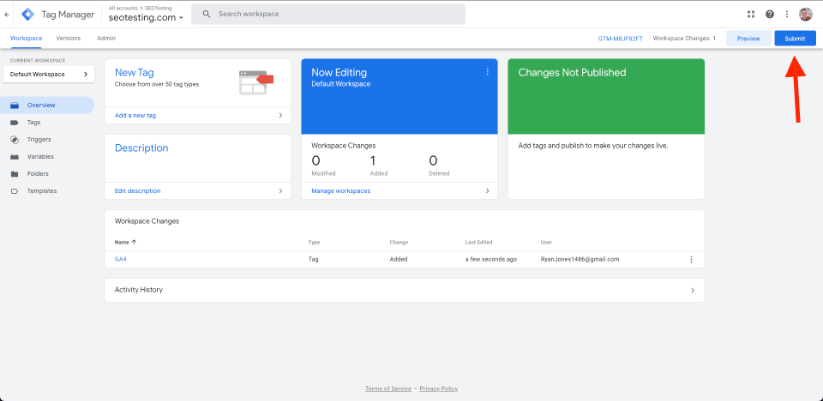
All you need to do now is close this window, go back to your GTM dashboard, and click “Submit,” which will take you to a new window where you can publish a change file to your GTM dashboard.
Click “Submit” as shown above, and enter the details of your change into the new window that is displayed:
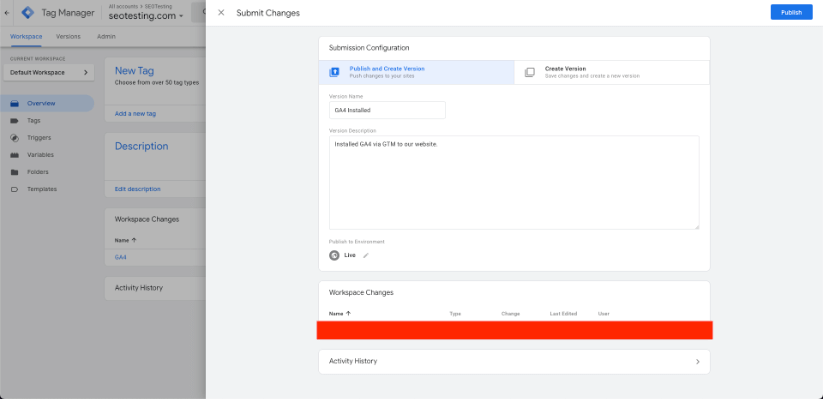
As you can see, we’ve labeled this change “GA4 Installed,” so we know what happened in this change iteration.
Then, click “Publish” and you’re done!
Option 3: Install GA4 via Plugin
If you use a website builder for your website, you are using Wix, Squarespace, or WordPress.
If you are using Wix or Squarespace, the good news is that these site builders have built-in GA4 connectivity within their software. All you need to do is navigate to a specific section of your website’s settings within Wix and Squarespace and input your GA4 Measurement ID.
As of 2024, WordPress powers nearly half of the number of websites on the worldwide web. So, we’ll focus this section of the guide on installing GA4 for WordPress.
To install GA4 on a WordPress website, you must install a plugin like “Site Kit” to do this. This is a WordPress plugin built by Google, so you can ensure it is reliable.
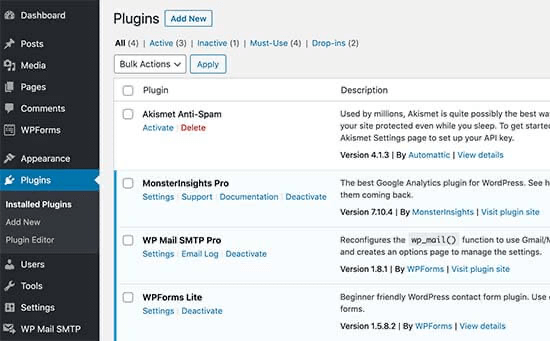
The first step is to head to your WordPress dashboard and navigate to the “Plugin” section of your panel on the left-hand side of your screen. You’ll see an option to add a new plugin. Click this.
Once here, you can use the search bar at the top-right-hand side of your screen:
Type “Site Kit” here and click search. You’ll be given Google’s option, which will most likely be listed at the top of the screen. Once you see it, click the “Install Now” button:

Once you are given the option, click “Activate” to activate the plugin on your WordPress site. Once activated, Site Kit will show on the left-hand side of your screen in the same toolbar that you found in your Plugin section earlier.
Click on this to start setting up Site Kit on your WordPress website. You’ll get a notice that it has not yet been configured. This is okay, as we will do the configuration work now.
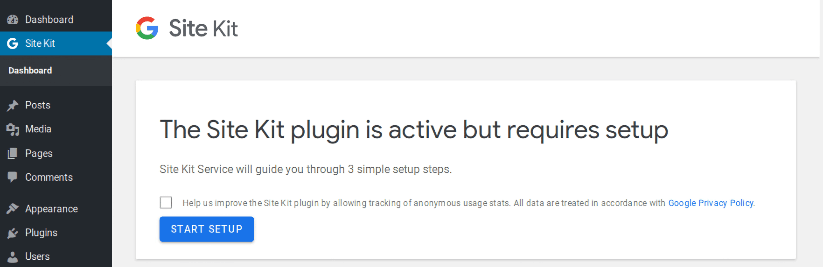
Click on the “START SETUP” button, and you will be taken to a new window to complete the installation of Site Kit. It will prompt you to sign in with Google. Do this and ensure you are using the same Google account that you used to create your GA4 account earlier.
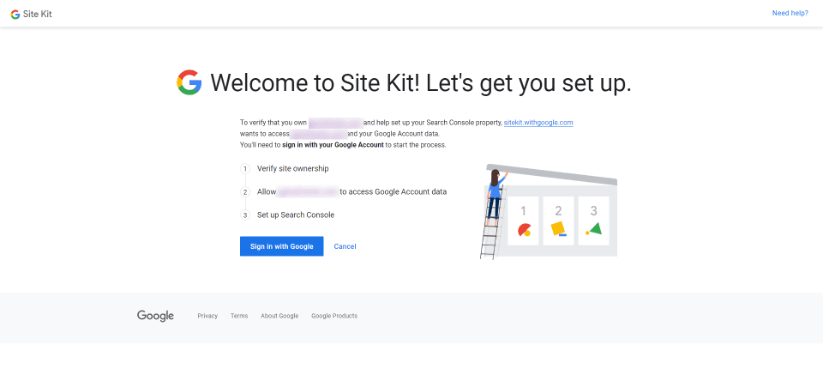
Once here, you will have three things to do:
- Verify your site ownership.
- Allow your domain to access Google account data.
- Set up Google Search Console.
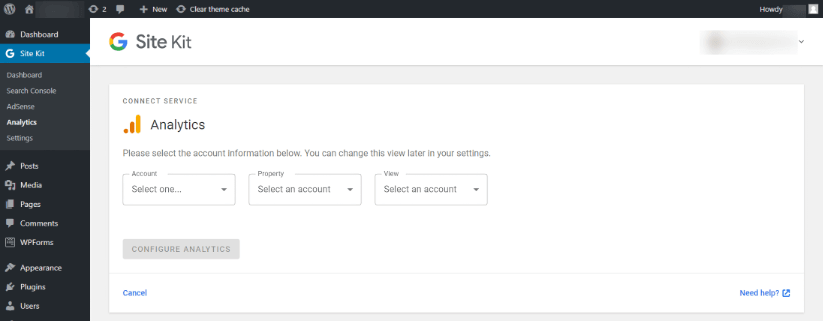
Once you have done all of these things, you will see a screen that says, “Set Up Google Analytics.” Click “Next” to install GA4 on your WordPress site.
On the “Connect Service” screen that loads, use the “Account,” “Property,” and “Web Data Stream” drop-down menus to select the GA4 account, property, and data stream you set up earlier.
Then, click “Configure Analytics.”
You’ll then be greeted with a success message that says Google Analytics has been successfully set up.
Wrapping Up
Setting up GA4 for your business provides a comprehensive and effective way to collect and analyze data crucial for informed decision-making and strategic planning.
From creating your GA4 account to installing it on your website, the process is streamlined to ensure ease of use across various platforms, whether through manual installation, Google Tag Manager, or website plugins.
Following the steps outlined will enhance your business’s operational efficiency and help you gain deeper insights into user interactions and behaviors. These insights are essential for driving growth and improving user experiences. Now equipped with a fully functional GA4 dashboard, your business is better positioned to harness the power of analytics to meet its objectives and stay ahead in the digital landscape.
Want to use GA4 data when conducting SEO tests? Give SEOTesting a try! Our custom GA4 integration allows you to see both the CRO impact of SEO changes and the SEO impact of CRO changes within your SEO testing dashboard! We have a 14-day free trial, so give us a spin.
Testimonials
-

"Can totally recommend! It’s not only full of reports to easily identify low hanging fruit opportunities but also, the most straightforward platform to help run SEO tests"
Aleyda Solis, Intl SEO Consultant, Speaker & Author.
-

"SEOTesting.com has become one of my go-to SEO tools because it does so much with all the valuable data hidden in Google Search Console. It's the only thing that gives us the ability to use that data for keyword tracking, SEO tests, and quality testing."
Ruben Gamez, DocSketch